


 English
 بالعربية
 Deutsch
 Français
 Bahasa Indonesia
 Italiano
 日本語
日本語 қазақ
қазақ 한국어
한국어 Bahasa Malay
 Монгол
 Nederlands
 Język polski
 Português
 Русский язык
 Español
 ภาษาไทย
 Türkçe
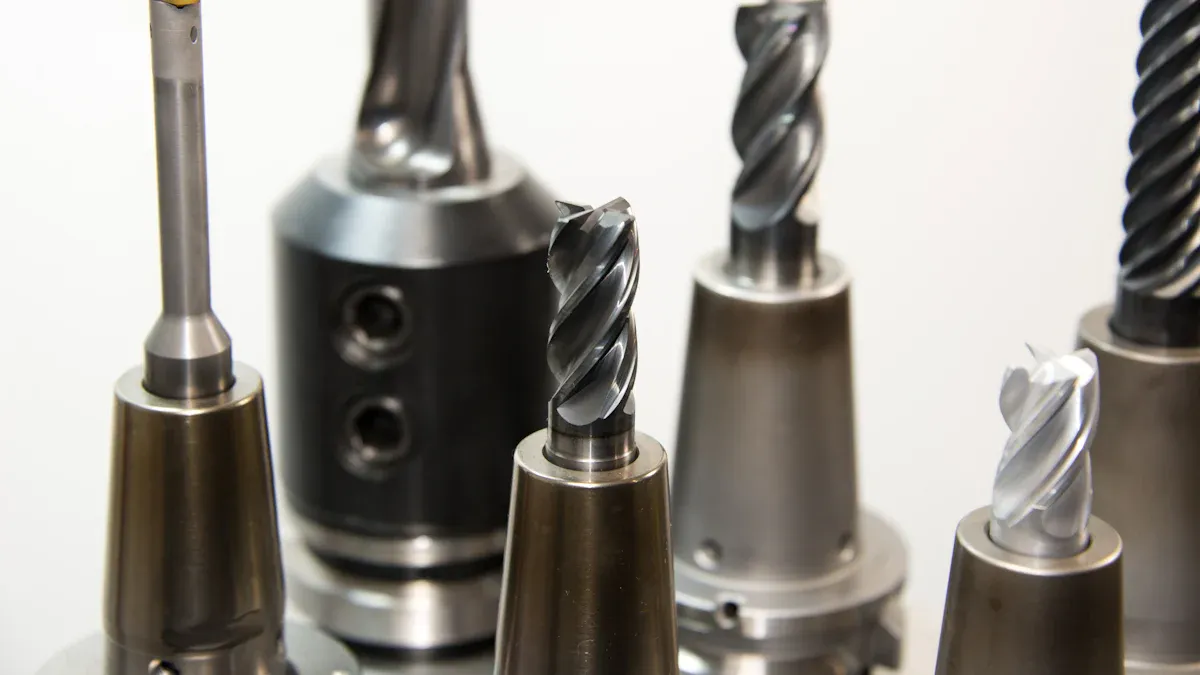
Mistakes with milling machine bits can lead to costly downtime and reduced efficiency. Proper handling and maintenance help you avoid unplanned breakdowns, which can cost up to ten times more than planned downtime. For example, unplanned downtime costs manufacturers approximately $50 billion annually, with equipment failure contributing to 42% of this. Regular inspections and proactive maintenance allow you to identify issues early, keeping your road milling machine running smoothly. Additionally, choosing the right bit can optimize performance and save tens of thousands of dollars by reducing drilling time. Always prioritize proper care to improve productivity and save costs.
Choosing the Right Bit for Your Road Milling Machine
Selecting the right bit for your road milling machine is essential for achieving optimal performance and avoiding unnecessary costs. The wrong choice can lead to inefficiency, increased wear, and even damage to your equipment. Understanding the types of milling bits, the factors to consider when selecting them, and the consequences of using an inappropriate bit will help you make informed decisions.
Types of Milling Bits and Their Applications
Milling bits come in various types, each designed for specific applications. Choosing the right one depends on the material you are working with and the desired outcome. Here are some common types:
Standard Bits: Ideal for general-purpose milling on asphalt and concrete surfaces.
Carbide-Tipped Bits: Known for their durability, these bits are perfect for heavy-duty applications and extended use.
Diamond Bits: Best suited for precision work and cutting through extremely hard materials.
Flat Bits: Used for shallow milling and surface smoothing.
Round Bits: Designed for deeper cuts and removing thicker layers of material.
Each type has unique strengths, so understanding their applications ensures you get the best results from your road milling machine.
Factors to Consider When Selecting a Bit
Choosing the right milling bit involves evaluating several criteria to match the bit to your machine and project requirements. Consider the following:
| Criteria | Capabilities to Assess |
|---|---|
| Operation Performance | - Rotation Rate: Speed and efficiency of milling teeth rotation. |
| - Cutting Force Retention: Maintaining strong cutting force for effective grinding. | |
| Expected Longevity | - Tip Durability: Durability of carbide tips affecting lifespan and performance. |
| Premature Failure Resistance | - Deforming Resistance: Ability to resist deformation under stress. |
| - Rust Resistance: Preventing rust to maintain operational efficiency. |
Additionally, consider the technical specifications of your road milling machine. Factors like horsepower, machine weight, milling drum size, and traction system play a significant role in determining the compatibility and performance of the bit. For example:
Horsepower: Higher horsepower allows for efficient removal of asphalt, especially for deeper milling.
Machine Weight and Dimensions: Heavier machines may require bits that can handle increased stress.
Milling Drum Size: Larger drums cover more surface area but may require more robust bits.
Traction System: Advanced systems improve stability, especially on uneven terrain.
Matching the bit to these specifications ensures smooth operation and reduces the risk of damage.
Consequences of Using an Inappropriate Bit
Using the wrong bit can lead to several problems, including:
Reduced Efficiency: Incompatible bits may struggle to cut through the material, increasing milling time.
Increased Wear and Tear: Bits not designed for the task can wear out quickly, leading to frequent replacements.
Damage to the Machine: Overloading or using the wrong bit can strain the machine, causing mechanical failures.
Higher Costs: Frequent replacements and repairs increase operational expenses. On the other hand, selecting high-quality bits reduces downtime and replacement costs, leading to significant savings.
By choosing the right bit, you not only enhance the performance of your road milling machine but also save time and money in the long run.
Proper Installation of Milling Bits
Common Installation Mistakes to Avoid
Improper installation of milling bits can lead to inefficiency, damage, and safety hazards. Avoid these common mistakes to ensure smooth operations:
Skipping Cleaning Steps: Failing to clean the milling table or spindle can cause misalignment and uneven cuts.
Overtightening or Undertightening: Excessive force can damage the bit, while insufficient tightening may cause it to loosen during operation.
Ignoring Compatibility: Using bits incompatible with your road milling machine can result in poor performance and increased wear.
Neglecting Test Cuts: Skipping a test cut may lead to errors that could have been corrected early.
By addressing these mistakes, you can improve the efficiency and safety of your milling operations.
Ensuring Secure Fit and Alignment
A secure fit and proper alignment are critical for the performance and longevity of milling bits. Accurate measurements, such as flatness, straightness, and squareness, play a vital role in achieving this. For example, aligning the machine ends with hole centering and shaft alignment ensures the bit operates smoothly. Using advanced tools like the E720 shaft/geo system enhances precision, reducing the risk of operational inefficiencies.
Additionally, always check the spindle and bit connection for tightness and stability. Misalignment can lead to uneven cuts, increased wear, and potential damage to the machine. Regular inspections and adjustments help maintain optimal alignment and functionality.
Tools and Techniques for Accurate Installation
Using the right tools and techniques ensures precise installation of milling bits. Follow these steps for best results:
Securing the Workpiece: Clean the milling table and secure the workpiece with clamps or a vise.
Selecting and Installing the Tool: Choose a compatible milling bit and install it securely in the spindle.
Setting Spindle Speed and Feed Rate: Refer to your machine's specifications to adjust these settings accurately.
Aligning the Machine: Zero the machine and align the axes with the workpiece.
Performing a Test Cut: Make a light test cut to verify the setup and ensure accuracy.
Precision tools like dial indicators, micrometers, and laser interferometers can further enhance accuracy. Regular calibration of your road milling machine also helps maintain high standards in machining, reducing waste and improving product quality.
Maintaining and Caring for Milling Bits
Proper maintenance and care of milling bits are essential for ensuring their longevity and optimal performance. Neglecting this aspect can lead to frequent replacements, reduced efficiency, and higher operational costs. By following a consistent maintenance routine, you can keep your road milling machine running smoothly and avoid unnecessary downtime.
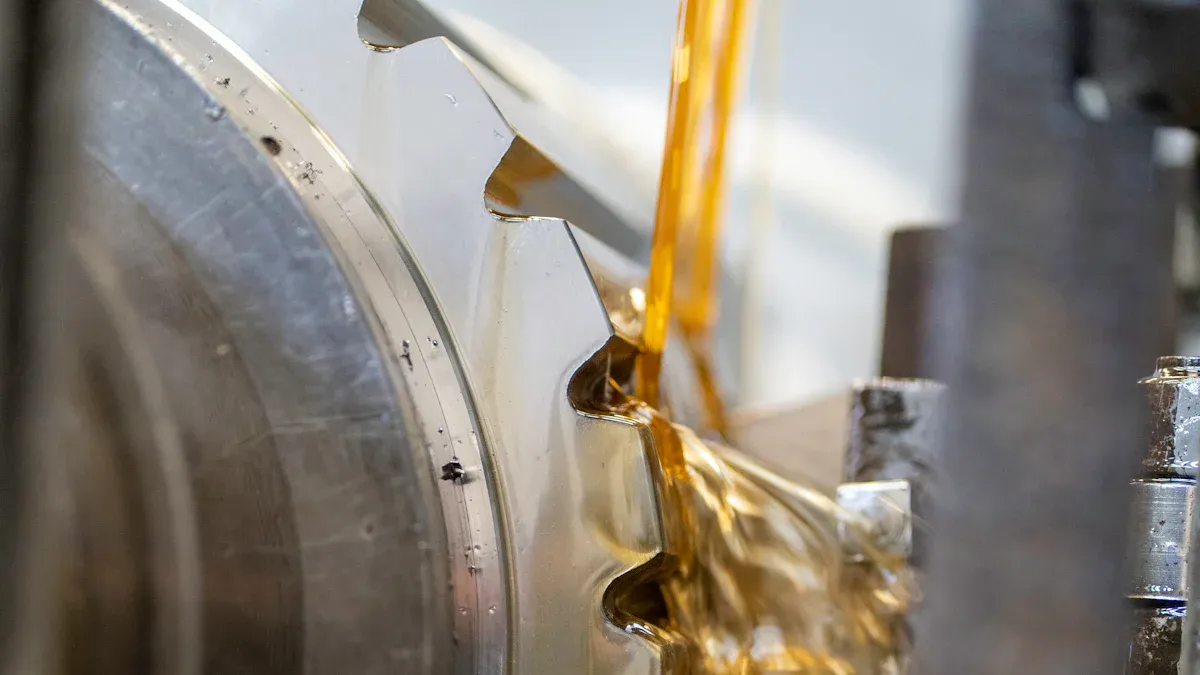
Cleaning and Inspecting Bits Regularly
Regular cleaning and inspection of milling bits prevent debris buildup and help identify potential issues early. Dirt, dust, and material residue can accumulate on the bits, reducing their cutting efficiency. To maintain peak performance, clean the bits after every use with a non-flammable solvent like acetone or compressed air. This removes stubborn debris and ensures the bits remain sharp.
In addition to cleaning, inspect the bits for signs of wear, such as chipping or dull edges. A quick daily check can save you from costly repairs later. For example, inspecting spindle bearings for oil leakage and checking the coolant level daily ensures the machine operates efficiently. Below is a suggested maintenance schedule to help you stay on track:
| Frequency | Maintenance Task |
|---|---|
| Daily | Inspect all covers, guards, and safety devices; Inspect spindle bearings for oil leakage; Check coolant level and quality; replace coolant as required. |
| Weekly | Inspect and adjust machine slideways (if required); Clean the control cabinet's filter to allow air to pass through for cooling. |
| Biweekly | Clean the machine thoroughly with compressed air or a non-flammable solvent such as acetone. |
| Monthly | Make any necessary adjustments to limit switches and emergency stops; Inspect the quill area for damage or burrs; Check the condition of all electrical wirings and motor brushes. |
By adhering to this schedule, you can ensure the bits and the machine remain in excellent condition.
Identifying Wear and Damage Early
Detecting wear and damage early prevents further deterioration and extends the lifespan of your milling bits. Manual observation is one of the simplest ways to identify tool wear. Look for common indicators like chipping, thermal cracking, or built-up edges. These signs suggest the bit may need replacement or repair.
Automated systems can also help monitor tool wear. These systems use sensors to measure power and force during milling. Deviations in power output or cutting forces often indicate wear. Some advanced software solutions even provide real-time alerts, allowing you to address issues immediately. Indirect measurement methods, such as model-based fault detection, are cost-effective and easy to install. They enable online monitoring, ensuring you catch problems before they impact production quality.
By combining manual checks with automated monitoring, you can maintain the efficiency of your road milling machine and avoid unexpected failures.
Tips for Extending the Lifespan of Bits
Extending the lifespan of milling bits not only saves money but also improves the overall efficiency of your operations. Here are some practical tips to help you get the most out of your bits:
Use the Right Bit for the Job: Always select a bit that matches the material and application. Using the wrong bit increases wear and reduces efficiency.
Avoid Overloading: Excessive force or speed can damage the bit and the machine. Operate within the recommended parameters to prevent unnecessary strain.
Store Bits Properly: Keep bits in a clean, dry place to prevent rust and corrosion. Use protective covers to shield them from dust and moisture.
Sharpen Dull Bits: Regularly sharpen bits to maintain their cutting edge. Dull bits require more force, which can damage both the bit and the machine.
Follow a Maintenance Schedule: Stick to a consistent maintenance routine, as outlined earlier, to keep the bits and machine in top condition.
Pro Tip: Investing in high-quality bits may seem expensive initially, but it reduces long-term costs by minimizing replacements and downtime.
By implementing these practices, you can maximize the lifespan of your milling bits and ensure your road milling machine operates at peak performance.
Avoiding Overloading and Misuse
Understanding the Capabilities of Your Road Milling Machine
Knowing the limits of your road milling machine is essential for efficient and safe operation. Each machine has specific parameters, such as horsepower, cutting depth, and feed rate, that determine its capabilities. Exceeding these limits can lead to overheating, mechanical failures, and reduced tool life. Always refer to the manufacturer’s specifications to understand what your machine can handle.
Before starting a project, conduct small-scale test cuts to evaluate how the material reacts under the machine’s force. For high-stress applications, simulate machining conditions to observe potential issues. These steps help you avoid overloading the machine and ensure consistent performance.
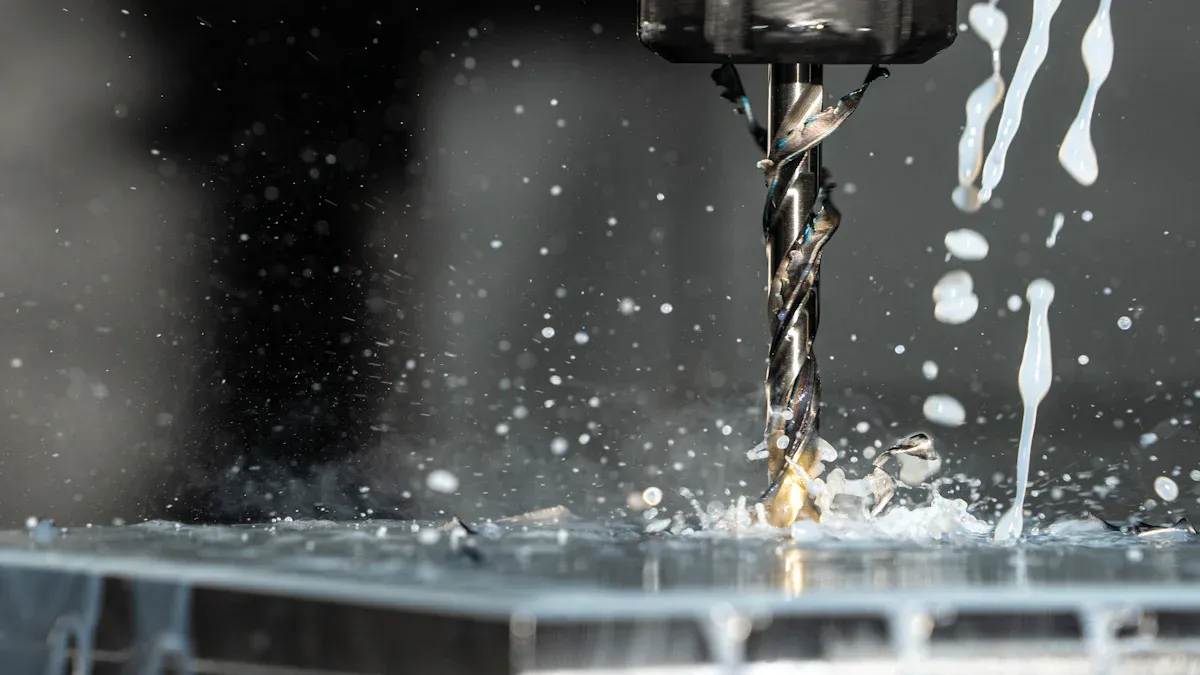
Preventing Excessive Force and Speed
Excessive force and speed can significantly impair machining efficiency. Incorrect settings often lead to faster tool wear, wasted material, and longer machining times. To prevent these issues, optimize your machine’s parameters. For example, lowering the feed rate reduces stress on the material, while using coolant prevents heat-induced cracking.
The table below highlights common causes of inefficiency and their solutions:
| Cause | Solution |
|---|---|
| Excessive Feed Rate | Lower the feed rate to reduce stress on the material. |
| Inadequate Cooling | Use coolant to regulate temperature and prevent heat-induced cracking. |
| Improper Tool Selection | Select sharp, high-quality tools to reduce force and avoid stress points. |
| Brittle Materials | Use shallow cuts and low speeds tailored for brittle materials. |
By addressing these factors, you can enhance the efficiency and longevity of your milling bits.
How Misuse Affects Bit and Machine Performance
Misusing your road milling machine can have long-term consequences. High feed rates, incorrect speeds, and insufficient cooling are common mistakes that reduce tool lifespan and increase failure rates. For instance, reducing feed rates by 10-20% can lower failure rates by up to 30%. Similarly, adjusting speeds within 10-15% of the optimal range prevents thermal damage and chipping.
Improper tool geometry also plays a role. Sharpening tools correctly can extend their lifespan by 20-40%. Additionally, supporting the workpiece properly reduces tool failure rates by 15-25%. Neglecting these practices not only damages the bits but also strains the machine, leading to costly repairs and downtime.
To avoid these issues, always operate within the recommended parameters and maintain your tools regularly. This approach ensures your machine performs efficiently and your milling bits last longer.
Following Safety Protocols
Essential Safety Gear for Milling Operations
Wearing the right safety gear is critical when operating a milling machine. This equipment protects you from common hazards like flying debris, loud noise, and sharp edges. Here are the essentials you should always use:
Eye Protection: Safety glasses or goggles shield your eyes from flying particles. Every day, about 2,000 workers in the U.S. suffer eye injuries, emphasizing the importance of this gear.
Hand Protection: Gloves prevent cuts, burns, and abrasions caused by sharp or hot materials. Choose gloves designed for metalworking to ensure maximum protection.
Hearing Protection: Milling machines generate high noise levels that can damage your hearing over time. Use earplugs or earmuffs to reduce exposure and protect your ears.
Investing in high-quality safety gear not only keeps you safe but also ensures you can work confidently a nd efficiently.
Importance of Pre-Operation Safety Checks
Conducting safety checks before starting your milling machine is a vital step in preventing accidents. These checks help you identify potential hazards and ensure the machine is ready for use. A proper pre-operation checklist includes:
Verifying the calibration of the tool head.
Testing the emergency stop and safety interlocks.
Ensuring all moving parts are properly lubricated.
Inspecting electrical connections and wiring for damage.
These inspections reduce the risk of injuries, prevent costly equipment damage, and ensure compliance with safety regulations. By following a systematic approach, you can create a safer work environment and avoid unexpected downtime.
Tip: Always perform these checks after maintenance or when using the machine for the first time in a shift.
Creating a Safe and Efficient Work Environment
A safe workplace fosters productivity and reduces the likelihood of accidents. Encourage hazard reporting to identify risks early. Involve your team in risk assessments to gain valuable insights into safety measures. Regular safety training enhances awareness and equips you with the skills needed to handle emergencies.
In my experience managing safety in a manufacturing plant, a near-miss incident due to ignored safety audits led us to implement regular training and inspections. This improved our safety culture and boosted worker confidence.
To maintain a safe environment, follow these steps:
Prioritize safety in every task.
Provide proper training and certification for operators.
Ensure all workers have access to personal protective equipment (PPE).
By adopting these practices, you can create a workplace where safety and efficiency go hand in hand.
Avoiding mistakes with milling machine bits ensures better performance and cost savings. Proper selection, installation, and maintenance prevent inefficiencies and extend tool life. Following safety protocols creates a secure work environment. Adopting best practices leads to measurable improvements, as shown below:
| Case Study | Description | Outcome |
|---|---|---|
| Well Killing Operations | Innovative approach to well killing operations | 50% cost saving |
| Clamp-on Metering | Improved operational efficiency on HPHT sour gas wells | Enhanced efficiency |
| Deep-water Subsea Wells | Fast-track production improvement of deep-water subsea wells | Faster production speed |
| BRUTE® Storm System | Innovative application generating significant cost savings | $2 million cost savings |
By implementing these strategies, you can optimize your milling operations and achieve long-term success.
FAQ
What is the best way to store milling bits?
Store milling bits in a clean, dry place. Use protective covers to shield them from dust and moisture. Avoid stacking them directly to prevent damage. A dedicated storage box or rack works best for keeping them organized and safe.
Tip: Label your bits for quick identification during projects.
How often should I inspect milling bits for wear?
Inspect milling bits daily or after every use. Look for signs like chipping, dull edges, or cracks. Regular check s help you catch issues early, preventing damage to your machine and ensuring consistent performance.
Can I use the same bit for different materials?
No, you should not. Each bit is designed for specific materials. For example, carbide-tipped bits work well on asphalt, while diamond bits are better for hard surfaces. Using the wrong bit reduces efficiency and increases wear.
What safety gear is essential for milling operations?
Always wear safety glasses, gloves, and hearing protection. These protect you from flying debris, sharp edges, and loud noise. Proper gear ensures your safety and allows you to focus on the task.
Reminder: Never skip safety checks before starting the machine.
How can I extend the lifespan of my milling bits?
Use the right bit for each job. Avoid overloading the machine and operate within recommended speeds. Clean and sharpen bits regularly. Store them properly to prevent rust or damage.
Pro Tip: Investing in high-quality bits reduces long-term costs and improves efficiency.